How to create a shared bedroom for a boy & a girl
Our oldest two children (Hunter age 8 and Ashlyn age 6) have shared a bedroom for about a year. It began when our in-laws brought us the bunk bed my husband used as a child and set it up in Hunter’s room. It didn’t take long before Ashlyn was joining Hunter each night and pretty [...]
The post How to create a shared bedroom for a boy & a girl appeared first on Mom4Life Blog.
Chalk paint dresser makeover (& a giveaway)
I used to be scared of projects like the one I recently completed. I never imagined I would be sharing a post about a piece of furniture that I restored. People that do things like that have blogs with names like “Crafty Mama” or “Furniture Chick” (neither of which oddly enough are active websites!) But here I am giddy with excitement to show you my “trash into treasure’ project which was all made possible by a product I had never heard of before until my good friend Selina over at Creative Juices for Decor told me about it. The product is Chalk Paint. At this point you likely fall into one of two categories. Either you are nodding your head in agreement saying “yes isn’t that stuff wonderful?” or you are assuming that I am talking about Chalk Board paint (also a fun product but totally unrelated).
“What is Chalk Paint?” you may ask.
Only all your furniture dreams realized in the form of a can of paint.
Only the most simple solution to restoration (the furniture kind) that I have found.
Only amazing. No sanding. No priming. A-mazing!
Ready to see it in action?
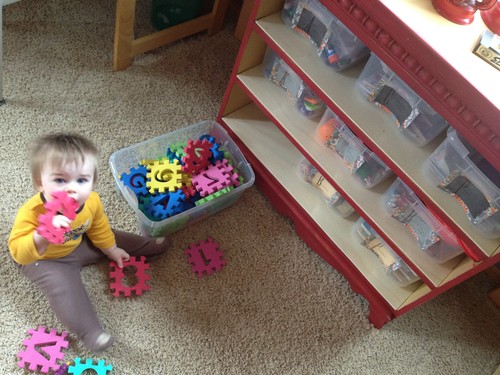
-I found a three drawer dresser on Craig’s List for $10. It was nice and solid and had good lines. I had planned to use it as dresser. However, 2 of the 3 drawers were sticky and didn’t slide well. I decided I could turn two of the drawers into shelves. I offered $5 and they agreed. As it was lifted into the back of my car, the 1 drawer that did work toppled out and broke on the road. Bummer. Not figuring that they would want to buy it back from me, I decided to see what I could make it into. I decided to remove all 3 of the drawers and install shelves, transforming it into a toy storage unit.
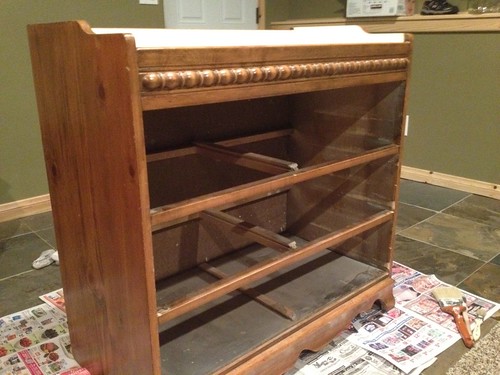
-Because the initial piece was two toned and because I was going to allow some of the under color to show through when I distressed it, I decided to replicate the two tones with my paint choices. I used the “Arles” (yellow color) Chalk Paint on the top “changing table” area and also on the inside. For the rest I used “Emperor Silk” (red color).
-The only “prep” work I had to do was wipe down the wood with a damp cloth to remove any dust and lose particles. After that, paint! The first coat of paint went on fairly quickly and I was surprised by how fast it dried. But the second coat was even faster. Because I planned to distress the furniture and allow the original wood to show through, I didn’t have to worry about putting the paint on thick enough to completely hide the original colors. I was amazed at how much could be covered with so little paint!
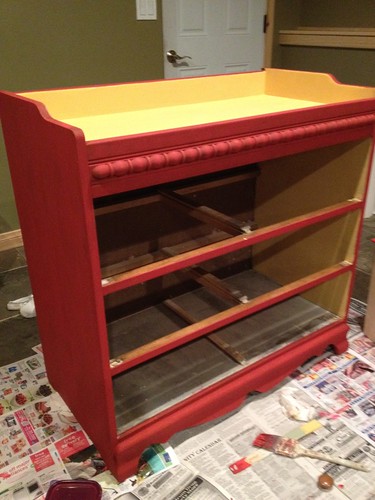
-Once both coats of paint were dry, I went over the entire piece of furniture with sand paper lightly sanding a smooth surface and spending more time on the edges, corners and any areas that I wanted to appear distressed and aged. This was a fun step.
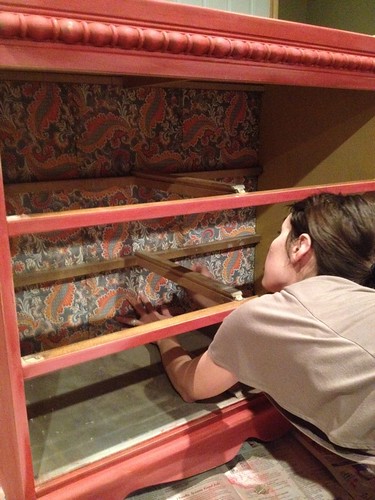
-Next I covered the inside back by painting Mod Podge over 12×12 sheets of coordinating scrapbook paper cut to size using a paper cutter.
-My husband cut to size 3 thin boards purchased at Home Depot and glued them on top of the pre-existing drawer sections (after removing the small wooden glide rail which was no longer needed).
-To finish the Chalk Paint, I covered the entire painted surface with one thin coat of Johnson’s Wax (which I purchased at Home Depot) using an old t-shirt. This provides a protective seal on the wood and brightens up the paint which, after sanding it, had been dulled.
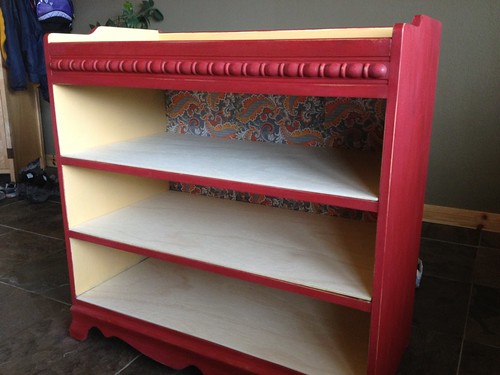
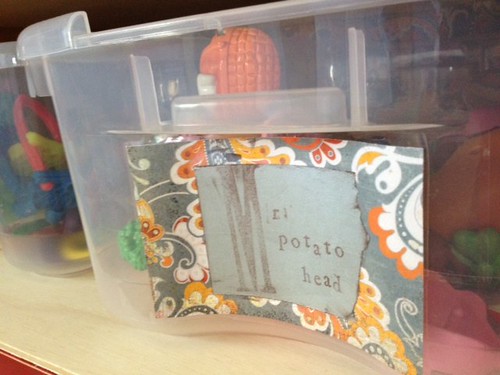
-Using some left over scrapbook paper from the Mod Podge part of the project, I created coordinating labels for the plastic storage bins. I choose to have the most baby friendly items toward the bottom and coordinated each row of labels to match, in an attempt to make it easy for the kids to put each drawer back in the correct section.
The end result turned out better than I could have expected. It is bright and colorful, highly functional and because of the distressed nature, durable to child abuse.
Being able to look for furniture based on how solid it is and the beauty of its lines, rather than its color, opens up a whole new world of possibilities. I had been initially hesitant when I first saw that Chalk Paint was sold by the quart rather than the gallon. I had only ever purchased paint for the purpose of re-doing an entire room. However, after finishing this project, I can now see that a small quart of paint would be more than enough for most furniture projects. There are even small 4 oz. “sample” Chalk Paint sizes available which can be used for smaller projects such as picture frames, chairs or a small bench or stool. I also LOVED that the VOC s are so low. I couldn’t detect any paint fumes which was a huge plus. I am already eyeing my next project! If you have some additional questions about chalk paint, you might find your answers on this FAQ page.
How about you? Would you like to try out Chalk Paint on your own project?
Of course you can simply go to the Stylish Patina and buy some, but I would love for you to win some! Kelly over at Stylish Patina has graciously offered to give one lucky Mom 4 Life reader a $45 gift certificate to her store! I might suggest spending it on a quart of Annie Sloan chalk paint ($38) and perhaps a set of paint brushes ($10) or “sample” Chalk Paint for accent colors or a small side project ($13.50). To enter simply fill out the rafflecopter form below (you must be on the blog to view the entry form). The giveaway can be entered until Monday June 18th (MST). There are several ways to enter, good luck!
Also, if you like to be inspired, Kelly posts some fantastic stuff over on her Stylish Patina facebook page, go take a look!
